Hey there, quick question—have you ever walked into an office, saw a chipped wood partition that’s been there for way too long, and thought, “Ugh, that’s a mess… could someone just fix that instead of buying a whole new one?” Yeah, me too. As a wood partition supplier, I hear this all the time. People either panic and say “I need a full replacement” or try half-baked fixes that make the damage look worse. But here’s the thing—most small to medium wood partition issues are totally fixable, no need to shell out for brand-new panels or hire a fancy contractor. I’ve been working with wood partitions for years, installing them, troubleshooting for clients, and testing DIY fixes in my own workshop, so I’m gonna walk you through exactly how to do it right. No jargon, no confusing steps—just what works. Wood Partition
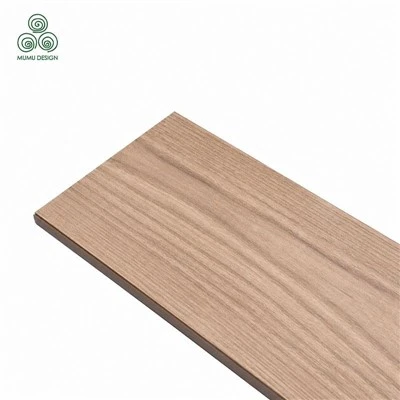
First, let’s get real: wood partitions aren’t just random wood planks. They’re built for office use usually, so most are either solid wood (super durable, but prone to scuffs/chips) or wood veneer over engineered wood (looks nice, but the veneer can peel or bubble). Fixing each type needs slightly different moves, but the first step for every repair is the same: assess the damage. You can’t just grab a glue stick and start sticking stuff without knowing what you’re up against.
Let’s break down the common damage types I see on the daily—chips, scratches, peeling veneer, and small dents. Those are the ones clients call me for 90% of the time, so we’ll stick to those big four. For each, I’ll cover the DIY route you can do at home, and when it’s time to hit me up for a professional tweak. That makes sense, right?
Starting with chips. A chip is when a little chunk of the wood’s surface (or veneer) breaks off—usually from someone carrying a heavy box, a chair leg scraping, or even a wayward stapler. This is the most common, and the easiest to fix. Here’s how I do it: First, clean the area. Use a soft cloth and a little rubbing alcohol to wipe out any dust, crumbs, or old glue in the chip. If you skip this, the new filler won’t stick, and it’ll pop off in a week. Next, grab wood filler. Wait—make sure it’s the right color. If your partition is oak, get oak-colored filler; if it’s maple, get maple. Most big box stores sell small tubes of tinted wood filler, or you can mix a little sawdust from your own partition (if you can scrape a tiny piece off a hidden edge) with wood glue to make a custom color. That’s a pro trick no one tells you.
Once the filler’s in, smooth it over the chip with a putty knife, press it in hard so it’s mounded a little—since it shrinks a tiny bit when it dries. Let it cure for 24 hours (don’t rush this; I’ve learned the hard way that skimping on cure time leads to lumpy spots). Then, once it’s dry, sand it super gently with 220-grit sandpaper—you want to buff it down so it’s level with the rest of the partition. Wipe off all the sanding dust, then add a thin coat of matching wood finish (wipe-on poly or a stain that matches your partition). If you do this right, you won’t even notice the chip was there.
Next up: scratches. Light scratches are just surface scuffs, no wood missing. Deep scratches are when you can feel it with your fingernail. For light scratches, I use wax sticks—you can get these at any hardware store, they’re made for wood touch-ups. Just rub the stick over the scratch, let it sit for a minute, then buff off the excess with a clean cloth. Done. Super easy, takes 2 minutes. For deeper scratches, it’s similar to the chip fix, but you just use a tiny bit more filler—no need to overdo it. Wait, but if the scratch is really long or goes all the way through the veneer, that’s when I’d suggest calling me. Veneer partitions can be tricky if the damage hits the core, and fixing that requires matching veneer strips, which is easier if you get a pro who has scrap materials laying around.
Peeling veneer is another big one. This happens when the glue holding the thin wood layer to the engineered core breaks—usually from moisture (like a water bottle leaking on the partition) or just age. I’ve seen this on partitions that are 10 years old, no surprise. How to fix this? First, lift the loose veneer gently with a flathead screwdriver wrapped in a cloth (so you don’t scratch the rest). Don’t pry hard—if the glue is still holding in spots, you’ll tear more. Once it’s lifted, clean the underside of the veneer and the spot on the core with rubbing alcohol. Then, grab wood glue (not regular white school glue—use PVA wood glue, it’s strong and flexible). Spread a thin, even layer on the core, then press the veneer back down. Get a weighted object—like a stack of books, or a clamp if you have one—and put it on top. Let it dry for at least 4 hours, preferably overnight. Once it’s dry, sand the edge super smooth and add a coat of finish. Pro tip: if the veneer is bubbled instead of just peeling, you can use a hair dryer on low heat to soften the glue, then press it down with a roller (even a paint roller works) to get all the air bubbles out. That’s way better than trying to cut the bubble out.
Dents—small indentations in the wood, no surface break. This is one I get asked about a lot, and it’s actually super easy to fix with steam. Here’s the hack: grab a clean cloth, soak it in hot water (not boiling—too much heat can warp engineered wood), wring it out so it’s damp, and lay it over the dent. Then, use a warm iron (set it to medium, no steam) and press it onto the cloth for 10-15 seconds. The steam from the cloth will make the wood fibers swell back up, and the dent will pop out. If it’s a deeper dent, repeat a few times. Once the dent is gone, let the area dry completely, then buff it with a little wood polish. Works like magic. I’ve fixed so many dented office partitions this way that clients think I’m a wizard.
Now, let’s talk when to bring in a pro (that’s me, hello). If the damage is more than a few inches—like a big chunk missing from the middle of a panel, or water damage that’s warped an entire section—DIY might not work. Water damage is a big one: if the partition has been wet for more than a day, the core might be swollen, and fixing that just patching the surface won’t last. Also, if you have glass-and-wood hybrid partitions (super popular in modern offices) where the wood is holding the glass frame together, don’t mess with that—wrong glue or force could crack the glass, which is a safety hazard.
Another thing: if you’re using engineered wood partitions (which most office ones are), don’t use solid wood products on them. Solid wood filler is too thick, and it’ll crack on the thinner engineered core. Stick to products labeled for veneer or engineered wood. I see so many people buy the wrong stuff and make the damage worse, so that’s a key tip.
Wait, also—prevention. Because fixing is great, but avoiding the damage in the first place is even better. What do I tell my clients? First, add felt pads to the bottom of any chairs or cabinets that are near the partition. That stops chair legs from scratching. Second, avoid placing water bottles, coffee mugs, or plants on top of the partition edge—spills are the #1 cause of peeling veneer. Third, dust the partitions regularly with a soft microfiber cloth—using a harsh cleaner can strip the finish over time, making it more prone to scuffs.
And hey, if you need replacement panels, extra veneer strips, or just to ask a question about a repair you’re not sure about—hit me up. I work with small offices and big corporations alike, so whether you need a single panel or a dozen, I can hook you up with the right stuff to keep your partitions looking good and lasting longer. No overpriced contractors, no confusing orders—just straightforward service.
Wait, let’s wrap this up so it’s not too long, but I want to make sure I didn’t skip anything. Let’s recap: Assess the damage first. Chips = tinted wood filler, cure, sand, finish. Light scratches = wax sticks. Peeling veneer = PVA glue, clamp, cure. Dents = steam and a warm iron. When to call me? Big damage, water damage, hybrid wood-glass partitions, when DIY makes you nervous.
Oh, and one last pro tip I forgot: if you don’t know the exact wood or veneer type, just bring a small sample of the partition (from the back edge, where no one sees it) to your local hardware store. They can match the filler, stain, or finish perfectly. I’ve had clients do this and come back saying their fix was unnoticeable, which is way better than that lumpy patch job I see people do when they guess the color.

At the end of the day, wood partitions are built to be repaired—they’re not disposable. A lot of people think “it’s just a partition, replace it,” but with these simple steps, you can save money, keep your office looking clean, and extend the life of your setup way longer than buying new. If you’re in the market for more partitions, need replacement parts, or just want to run a repair by me, feel free to reach out.
Faux Beam References:
- Forest Products Laboratory, U.S. Department of Agriculture. Wood Repair and Maintenance Guide for Office Furniture and Partitions.
- Woodwork Institute. Best Practices for Repairing Engineered Wood and Veneer Surfaces.
- Practical Woodworking Magazine. Home and DIY Techniques for Fixing Common Wood Office Fixture Damage.
Dongguan Mumu WoodWork Co., Ltd.
As one of the most professional wood partition manufacturers and suppliers in China, we also support customized service. Please feel free to wholesale bulk high quality wood partition for sale here from our factory. Good service and low price are available.
Address: Room No.2602-2603, Unit 9B, Universal Commerce Center, Nancheng District, Dongguan City, Guangdong Province, China,523073
E-mail: sales@mumu-ing.com
WebSite: https://www.mumuthermowood.com/
